
Photos out of control? 6 steps to take control of your family photos forever!
Do you feel overwhelmed by the amount of family photos you have sitting on your hard drive, unorganised and unloved? Do you worry that one day you’ll lose them all and your children will have no photos of their childhood? Do you love the thought of having family albums but don’t know where to start?
In the digital world that we live in it’s so easy to get our photos out of control. We go on holiday and rather than coming home with 36 photos on a roll of film you then take to get developed, you come home with hundreds of photos (with dozens of the same thing!) that you keep on your hard drive and never do anything with. Perhaps you share some on Facebook or print a few out and frame. But the rest just sit there unloved.
If you follow my simple 6 step plan you can take control of your photos forever. And if you have years (or decades!) worth of unorganised photos, don’t worry. Just start from now and you can gradually go back and sort through your old photos. Just make sure you take control of it now!
Step 1: Back up!
I know it’s not the most exciting of subjects, but it is SO important that you back up your photos.
Every week I hear about someone whose hard drive has crashed and they have lost all of their family photos. Don’t let that happen to you!
You should back up in at least three places. That might seem like overkill but it’s really not. You should keep your photos on one hard drive whether it’s your computer or an external hard drive. Then back that up with a 2nd hard drive (you’d be amazed how often hard drives fail!) Then ensure all of your photos are backed up in the cloud so if anything horrible such as a fire or burglary happened, at least you have your photos backed up outside of your house. I use Backblaze for my cloud storage.
Step 2: Get organised
Make sure that you have a system for your photos. Some people have all of their photos saved into one folder with no system at all. That’s a quick way to get overwhelmed!
Instead make sure that you have an organised system so that you know exactly where to find your photos. There are lots of different ways to do this, but the way I do it is save my photos by year, then by quarter, then unedited and edited images in different folders. If there has been a big event in one of the quarters such as a holiday or birthday then I will save a separate folder for this as well. So it would look something like this: 2015/Apr-Jun/Sam’s birthday/edited photos
Step 3: Cull your photos
At least once a month schedule some time to go through your photos and cull them. This is always the most challenging part!
With digital cameras it’s easy to shoot literally hundreds of photos in one trip to the park, and storage is inexpensive now so why wouldn’t you keep them all?
Well think about your grandchildren in 50 years time. They get your old hard drives down from the loft (that’s if they are still usable, but more about that later!). Do you really think they want to go through thousands upon thousands of photos including the blinks and the blurry photos? Unlikely! Most of us just have a few select photos in an album from our childhood which is so lovely to have, so as you’re culling your images think about it as a wonderful gift that you’re leaving to future generations.
Go through your images and delete any that don’t make you feel happy or that aren’t a great memory of that moment. Get rid of any blinks, out of focus shots or any that are too similar to each other. Rather than going through your photos and choosing the ones to delete, go through and choose your favourites then you can delete the ones that aren’t. That makes it a much more pleasant job as you’re not sat there agonising over whether to delete a photo or not!
It’s best to do this using photo software such as Google’s Picasa (which is free) or Lightroom. Then you can use their star system and can quickly go through and star your favourites.
Step 4: Edit your photos
This step isn’t a necessity. I’m a big believer in getting things right in camera so you don’t have to spend hours in front of your computer afterwards…that’s precious time you could be spending doing something else!
But if you want to print and display some of your photos, spending a few minutes editing them can make a big difference. If you are completely new to editing, Picmonkey is a great editing tool which is very easy to use.
Step 5: Create a digital family album
I’m very passionate about getting our photos off our hard drives, into albums and out on display. I worry that we are raising a generation who will have their childhood memories destroyed on hard drives. And who even knows what memory storage they will be using in 50 years time (remember floppy discs?!) so the only way to ensure your photos are passed through the generations is to create albums. And there is nothing better than actually holding your photos in your hands.
I also think this is one of the best ways to help you take control of your photos. If you’re creating an album each year then it gives you a reason to take time out to organise your photos, select your favourites and design your album.
If you’ve got years and years of photos, don’t worry, just start with the last full year and gradually work your way back if you get time. Even if you just have an album a year from now on, that’s better than nothing! And if creating an album for a whole year just seems like to much work, why not just do one for a holiday each year? Then your children will have all of these lovely holiday albums to look back on.
There are lots of great digital album companies out there. I personally use Blurb as I find their software intuitive and their printing the most reliable.
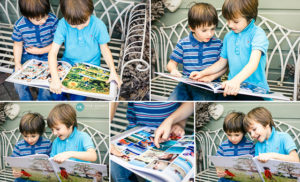
All of my albums are 30x30cm square so that they look good next to each other on the shelf. I get 2 printed, one that the boys can flick through without me getting anxious about them ruining it, and one to keep hidden away!
I take a lot of photos with my iPhone, but rather than overwhelm myself by trying to put them all chronologically with my ‘proper’ photos, I put all of my iPhone photos at the back of the album in chronological order which makes life so much easier!
Also I save all of the photos from the album onto a CD and stick it to the last page of the album. Then in the future, my children will easily be able to find a photo they want in the album, then print it off without having to search through 10 different hard drives!
Step 6: Enjoy your album
This is the very best part….the feeling of satisfaction when you receive your family album in the post. We all look through it as a family and reminisce about all of the fun things we got up to the year before. My boys often get the albums out and sit there looking through them and giggling with each other. It makes all of the hard work doing the first 5 steps so worth it!
My Online Photography Course for Parents is now out!
I’m offering all Project Me readers a 25% off discount when you join using this special discount link. Offer automatically applied!
I hope this post has inspired you to get your photos organised and printed! I’d love to hear from you in the comments below. Which of these steps have you not done in the past? Do you print many of your photos or are they all stuck on your hard drive?
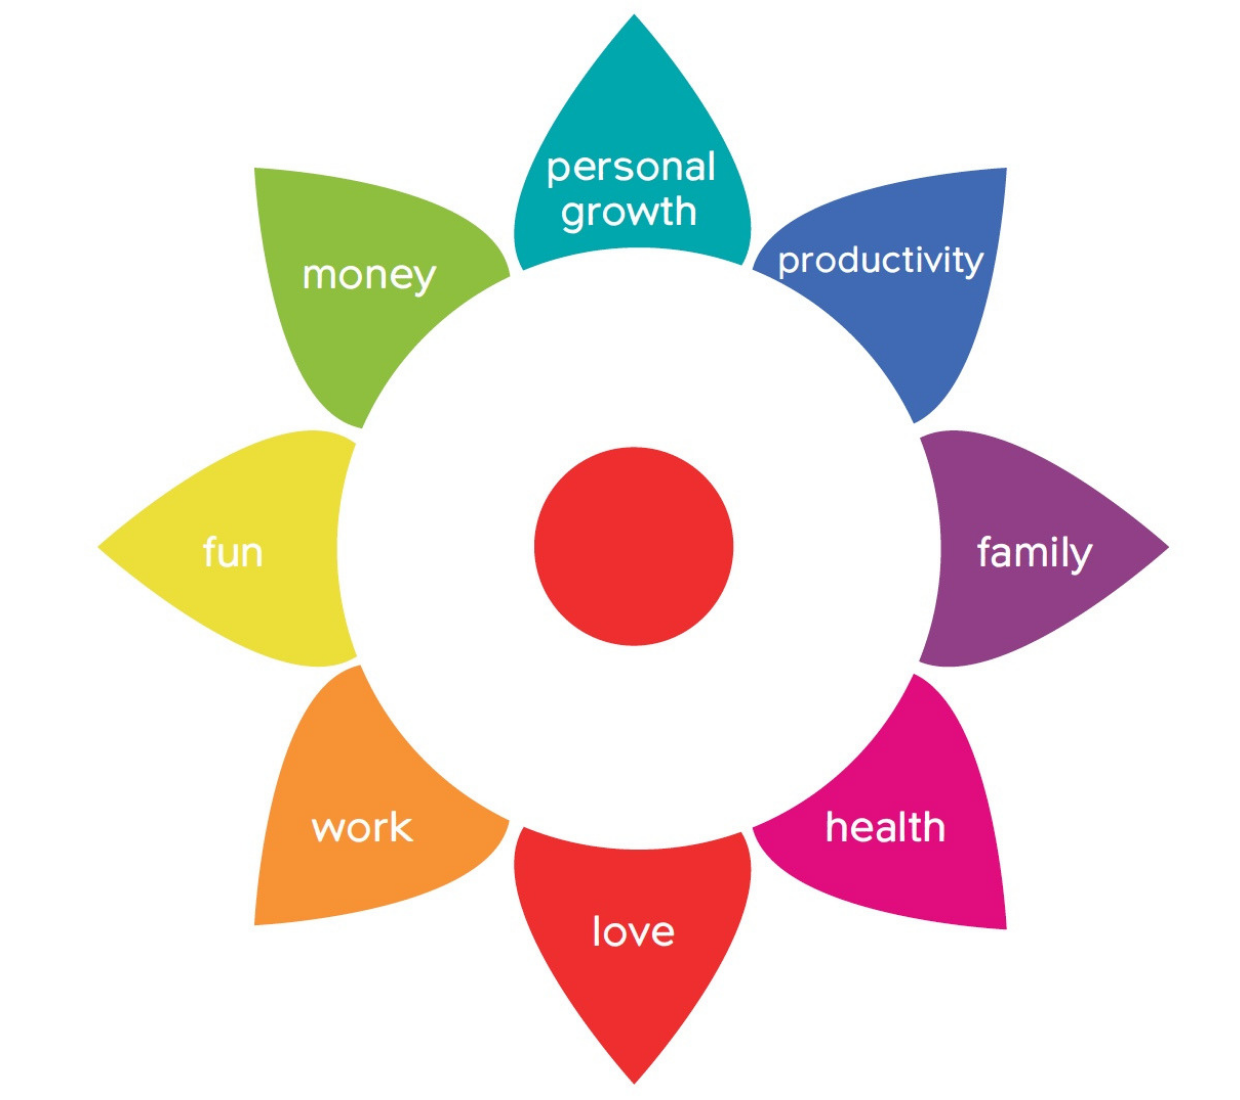
Have you got the FREE & FABULOUS Project Me Life Wheel® yet? It’ll quickly show you where you’re currently out of balance so you know what needs your focus FIRST.
Enter your first name and email address below:
You will also receive the Project Me newsletter to keep you motivated and inspired in all areas of your life.
I won't bombard you or share your details with anyone - promise.



Vicki – thanks so much for breaking it down into smaller steps like this. This is one area of my Productivity that I’ve never had a handle on and I get SO freaked out that I could lose my kids entire childhood photos because I’m paralysed with overwhelm on where to even begin.
Last year I looked into backing them all up into the cloud, but then saw the cost of storing 12 years worth of pics and felt like this would be a yearly cost for the rest of my life (I mean when am I ever going to decide I just don’t want to store my pics anymore??). So I will check out Backblaze as I’d never heard of them before.
Would I be wise to go to Step 3 first and cull before I pay to store thousands of pics I won’t even want? (Guilty of not deleting duplicates and having WAY too many pics of each event instead of just the very best ones…)
For some reason, Step 3 is the one that’s calling to me the most right now. I can schedule in a Power Hour each week and see how much culling I can achieve in an hour. Maybe as I’m culling I can star my favourites to make Step 5 easier?
Thank you for writing this guest post for Project Me. I’m pretty sure I’m not alone?!
Hi Kelly, I’m so pleased you found it useful! I think you should start by setting up Backblaze anyway. It only takes a few minutes to set up and is $5 a month for unlimited storage. It takes a few months to back up everything on your hard drive so it’s worth setting it up as soon as you can.
Then you can start culling and Backblaze will just back up what is left on your hard drive. Definitely cull your photos by starring your favourites and deleting the rest, it does make it much easier!
Think how satisfying it will be when all your photos are organised and printed out…… good luck with it! Vicki
Yes – it’s going to feel SO satisfying when it’s done!!
Another Q please…. you mention that backing up everything will take a few months… can you explain?
$5 a month of unlimited storage is miles better than options I’d explored last year! THANK YOU!!
Yes it really can take a few months with Backblaze or any other cloud storage provider. It uses your broadband connection to back everything up and if you’ve got say 500gb of data on there that takes a long time to back up. I just checked on Backblaze’s website and apparently the average time is 2 weeks.
So I would definitely get it set up asap!
Fantastic blog post! Thank you Vicki & Kelly! It does indeed get overwhelming to tackle the photo albums (well big fat mess of photos actually!) this has given me some great ideas! Xxx
So pleased you found it useful Lizz!
Vickix
Vicky and Kelly, thank you so much for this post! I so needed to read it! I felt overwhelmed by the task and put off sorting all my photos out. Until now x
Hi Basia, thanks so much for taking the time to comment. I’m really pleased you found the post useful. Good luck with the big photo sort out! Vickix
I feel very overwhelmed when it comes to photo storage but this blog is great! At the moment I have my last couple of years on iCloud storage – Dropbox (is this ok? It does seem expensive) and previous to that backed up on a portable harddrive. BUT I haven’t printed an album for about 8 years eeek! And I’ve had two children in that time!
Hi Kate, so pleased you like the blog! Yes Dropbox is great but can get pricey for lots of storage. What I like about Backblaze is that it’s only $5 a month for unlimited storage and that includes any external hard drives that you have connected to your computer.
Good luck creating your albums!
Vicki
Great post. I’m definitely like Kelly and feel like it’s a ma mouth task so bury my head!!! When I used a PC my photos were super organised as you suggest in years and then months. Since switching to a Mac everything seems to be in iPhoto and you can’t have folders within folders. How do you sort things out on a Mac!??
Hi Karen, I’m glad you enjoyed the post.
I don’t use iPhoto on my mac but I found this great post with tips on how to organise your photos. http://www.icreatemagazine.com/tips/top-ten-iphoto-organisation-tips/ I like the sound of tip number 4 so you can merge lots of dates into one event such as a holiday. I hope that helps a bit?
Vicki
Thank you so much for this post Vicki and Kelly! This is definitely something I’ve been meaning to tackle for a long time. I’ve actually got so many photos on my laptop that I’ve pretty much used up all the memory! And backup? I used to do it regularly using my mac’s time machine (so easy!), but I’ve run out of space on my external hard drive too. As I write, I’m installing backblaze because I do fear losing all these priceless photos–thanks for the suggestion.
Someone suggested that to free up space on my computer I should consider storing previous years of photos on an external drive. I use iphoto to organize them and am worried if I do this I will lose the little organization that I have! Do you have any thoughts or suggestions about doing this?
Thanks for the tip about printing two photo books. I like the idea of having one for the kids to look through (and not worry about messing up!) and one to save for later. Blurb looks like a well designed and affordable online photobook publisher. I created one photobook using iphoto documenting my son’s first year. It’s nearly finished, but I’ve never printed it, because like most apple products, it turned out to be quite expensive. I’m now inspired to finish it and bite the bullet to have it printed and probably use blurb for future photo books. Thanks again for all the great info–I’m really motivated to work on this again!
Hi Allison, thanks very much for your comment. I’m so pleased you found the blog post useful.
I don’t use iPhoto myself so I wasn’t sure about backing it up on an external hard drive, but I have looked into it and found this great guide: http://appleinsider.com/articles/15/01/25/how-to-safely-move-your-macs-iphoto-library-onto-an-external-drive
So it seems as long as you connect the hard drive then iPhoto will work as normal.
I hope you like Blurb if you do use them. Between 15th and 18th May they are doing a flash sale with 35% off. The code is ‘MAYFLASH35’. So that may motivate you to get an album created!
Thank you
Vicki
I’m a Mac / iPhoto gal too and am grateful for this link Vicki – thanks 🙂
I find the Apple photo albums to be outrageously expensive too Allison. And when you order duplicate photo calendars for relatives for Christmas, you have to place each order separately and pay ridiculous delivery charges! I’m happy to move over to Blurb on Vicki’s recommendation.
I love these tips! If I could just start breaking the photos down into folders so I could find them, that would be a HUGE first step. The goal of culling the bad ones out sounds so incredibly daunting, but I suppose I could just do that while sitting in front of the TV. Who ever knew photos could be so much work! Thanks for the excellent tips!
I know what you mean. I’m cursing myself for ever letting it get this way and I just told a friend who’s had her first baby to edit her pics and put into folders habitually to save herself from this momentous task in the future! Good luck Deb 🙂
Hi Deb, I’m so pleased you like the tips. I know who would think photos would take so much time. With digital photography came huge convenience and cost savings, but also means that people take so many more photos and do nothing with them! I hope you have found some time to cull your photos and hopefully are making some headway! Thanks, Vicki
Some neat ideas, tahnk you. Do you have any suggestions on how to manage when i’ve got the images i’ve taken and then there are the images my hub has taken too.
Is there an easy way we can centralise the management of images? I tend to back mine up with Picasa off my phone with select folders online.
He uses Lightroom but i don’t feel like i need the full grunt of Lightroom…
m
Hi Marion, I’m glad you found the post useful.
That’s an interesting question that I haven’t been asked before! I tend to download my husbands photos on to my computer so that all of the photos are in the same place and then I keep control of the organisation of them! I use Lightroom for my organisation and it is fantastic for that, but Picasa is really good as well. I would suggest using one central system that both of you can use so that you can stay on top of them more easily and create albums from both of your photos.
So although it will take a bit of work initially to get all of your photos into either Picasa or Lightroom, it will make life much easier in the long term!
I hope that helps. Good luck!
Thanks,
Vicki
[…] from organising photos and videos, decluttering and purging old toys and clothes – to taking a course or attending a workshop, […]